
Here at Curious Minds, we have recently developed a new tagline for our company – ‘Inspiring Discovery’. If you’ve followed us for a while then you probably know what we’re all about and what this tagline means for us but in case you’re new here (welcome, please stay a while!), let me explain what this represents for us. The aim of Curious Minds is to expand the minds of children AND adults alike. We want to inspire your discoveries whether you’re a little one experimenting with one of our Galt science labs or someone a little older building a camera obscura with one of our Astromedia kits. The discoveries we aim to inspire range from something as simple as discovering your ABCs to something as big as discovering the laws of physics to something as special as discovering your imagination, your creativity, your talent. To inspire your discoveries is our greatest privilege and honour.

The History of Easter Traditions
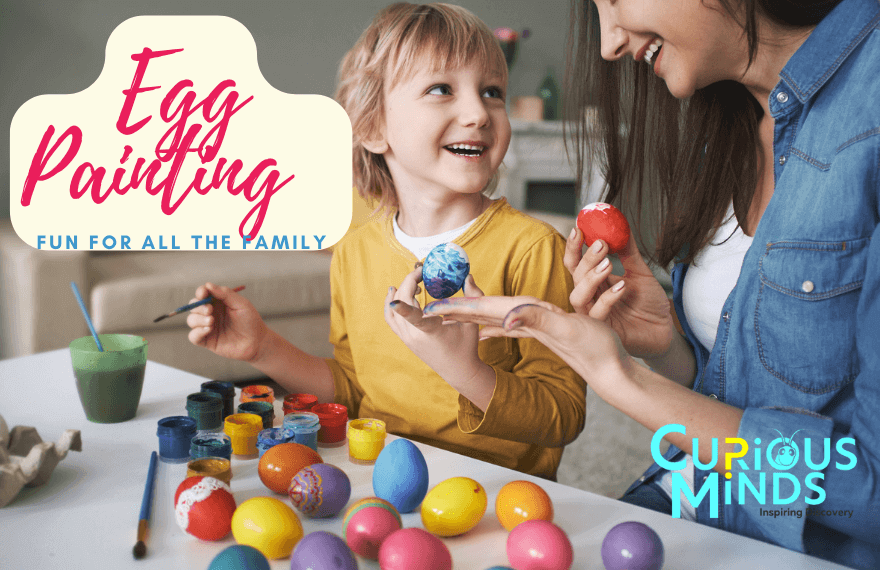
Through our customers we are also constantly discovering and learning new things. This April we thought we’d take some time to learn a little about Easter, its roots and traditions. We also thought we’d take this time to share with you all some child safe, non-toxic, natural ways to dye your Easter eggs this year. Whether you use your eggs as pretty decorations, as part of an Easter egg hunt, or you just eat them all up, this is an activity you can enjoy with friends and family using all natural ingredients you can find in your kitchen.
Easter is originally a Christian holiday created to celebrate and remember the resurrection of Christ however over many years it has become a more secular holiday enjoyed by many as a celebration of Springtime. In fact, many Easters traditions stem from various cultures and regions around the world, some of which we’ll learn about today. Alongside Easter comes many associations such as the Easter Bunny, Easter egg hunts, chocolate eggs and chocolate bunnies, and we can’t forget – the dyeing of eggs. Now, two words came up a lot there, bunnies and eggs so let’s find out why.

Easter Bunnies Bring Easter Eggs!
Everybody knows that chickens lay eggs and bunnies … well … they don’t, but did you know that there is one very special bunny that can lay eggs and is so generous as to share those eggs with children year after year? That’s right, the Easter Bunny is in possession of this very scientifically plausible gift! The question is: how did the story of the Easter Bunny come to be and why is it so popular?
Many theorise that the Easter Bunny stems from the ancient Pagan festival of Eostre – a festival created to honour the goddess of Spring and fertility. The animal associated with this goddess was of course a rabbit. Rabbits are deemed symbols of fertility as a result of their high reproduction rates – they make lots of baby rabbits! The first introduction of the concept of the Easter Bunny into the mainstream was recorded in the 1700s when German immigrants to America brought over the tradition. The name they had for the Easter Bunny was ‘Osterhase’ and they believed this rabbit would lay beautiful eggs in all colours of the rainbow and gift them to children who had been well behaved. The Easter Bunny would place its eggs in baskets made by the children (these baskets which resemble birds’ nests were also considered symbols of new life, more so if they were brimming over with eggs) who would often leave their own gift of carrots for the bunny to snack on during its travels. In some countries the eggs are said to be delivered by a cuckoo or even a fox.
Now this idea may sound familiar – getting gifts for good behaviour from a kindly magical stranger, giving something in return etcetera but it’s totally NOT to encourage you to always be nice to mum and dad … right? Oh, and to answer the question of why the Easter bunny is so popular – its super cute and comes with chocolate, need I say more? Over the years the tradition has developed from brightly coloured eggs to big chocolate eggs to toys and sometimes to a little bit of pocket money from gran and grandad. Shh don’t tell mum!

We’re going to head back to basics and help you to create some multi-coloured eggs like the Easter Bunny intended but first we need to answer another question, why eggs? The answer to this one is simple and goes right back to what we mentioned earlier. Easter is a time of new life from any perspective – whether it’s the birth of new lambs, the resurrection of Christ, or simply the trees regaining their beautiful green leaves and the daffodils peeking through the ground. Eggs themselves are common symbols of rebirth and fertility as they are quite literally housing a new life preparing to burst forth into the world and squint at the sun. We mentioned Pagans before, but the Romans also offered eggs to their Goddess of agriculture, named Ceres, in the hopes of growing good, healthy crops that year. Additionally, way back in the Middle Ages (when your parents were born) the Church banned people from eating eggs before Lent so by the time Easter came around farmers had a whole lot of eggs lying around which made them a staple during Easter and people even began decorating them. You see where I’m going with this?

How To Make Natural, Eco-Friendly Food Dyes
Over at Curious Minds we love learning new natural and organic ways of life, furthermore the health and safety of your little ones is our utmost priority. With all of that in mind, we decided to learn about some child safe, non-toxic, natural ways to dye your Easter eggs this year. Which also means you can stash the chocolate eggs away for yourself!
The first thing you’re going need is of course several unpeeled hard-boiled eggs. You can use white or brown eggs to do this or better yet use a variety to see a bigger spectrum of results. Add 2 cups of water to a saucepan (you can increase this depending on how much dye you wish to make) and then add the ingredients that create your desired colour to the water (amounts included below but you can adjust as you see fit). Bring it to a boil and then lower the heat and leave it to simmer for between 15 to 30 minutes or until you’ve created a colour you like. Keep in mind the eggs will likely turn out lighter than the colour you’re seeing in the pot. Once you’re satisfied, remove your pot from the heat and allow it to cool to room temperature before straining the liquid and then pouring it into separate containers for each colour. Add 1 teaspoon of vinegar to each container of dye. Then simply place your eggs in the dye and place the containers in the fridge for any amount of time from 30 minutes for a subtler tint to overnight for the most vibrant hue. If you’re unhappy with the vibrancy of the egg you can always place it back in the dye no problem. Once your egg is the colour you want carefully remove it from the dye and place them on paper towels to dry. If you’d like your eggs to have a nice sheen rub some vegetable oil on them after the dye has dried and then polish them with some kitchen roll. Place your eggs in the refrigerator until you’re ready to eat them, race with them, hide them, roll them, or decorate with them. The eggs can stay in the fridge for roughly a week.

Creating the colours:
Red/Lavender – 2 cups of red onion skins
Orange on white eggs/Rust red on brown eggs – 2 cups of yellow onion skins
Yellow – 4 tablespoons of ground turmeric
Pink on white eggs/Maroon on brown eggs – 2 cups of shredded beetroots
Green on white eggs/Blue on brown eggs – 2 cups of chopped purple cabbage
Green – 2 cups of spinach leaves
Grey/Violet – 1 cup of frozen blueberries
Pale blue – 2 cups of red cabbage
Lavender -2 bags of hibiscus (Red Zinger) tea
You can get even more creative by dipping flowers or leaves in water and placing them on the eggs (if you’d like you can add materials like lace for more fun designs). Next, take old tights/pantyhose cut into pieces and wrap them around the design and carefully tie with string. Alternatively, you can lay your selection from the garden on the pantyhose first and then wrap it around the egg and add string. Finally, simply place your egg in the dye as explained above. The design on your eggs will end up looking very similar to what you’d get with sun print paper – a staple here at Curious Minds.
We hope you give this new method of dyeing your Easter eggs a go and, if you do, please send us some pictures of your completed eggs on any of our social media accounts! Happy Easter from all of us at Curious Minds! We hope to share many more inspiring discoveries with you in our coming blog posts and newsletters, we’re just getting started!
Have fun & Happy Easter!
From Holly & The CuriousMinds Team
